Lego Man Hand Modelling

I thought I’d do the hand quickly before I went to bed. That turned out to be a bad idea because I couldn’t work out the angle the stick part of it went.

I started by drawing and then extruding the actual hand part.

Hand #1 Hand #2

Next I added a plane on the back, drew a line angled down and used that as a profile to extrude the stick part.

Hand #3 Hand #4

Then added colour and it was done. Once I worked out what to do with the stick part it was really easy and I got it done fast.

Hand $5

Lego Man Waist Modelling

I decided to put off doing the horribly complicated arm and started on the waist of the Lego Man.

At first I wasn’t really sure how to start this one, so I decided to go from the middle outwards. I figured since it is a fully symmetrical part that I could do half and mirror it so I quickly sketched up the centre part.

Waist #1

Then I sketched up the lower part where the legs/feet join on. It was quite fiddly getting all the dimensions for the ‘clip’ bit I had to go back later and change a few details because it didn’t originally work with the legs.

Waist #2 Waist #3

After that I moved on to the upper part that slides into the torso. I went straight to my model of the torso to get the dimensions I would need but when i checked on the lego man the proportions were almost identical so I was happy with that.

Waist #4 Waist #5

Next I hollowed out the inside of the torso connection.

Waist #6


Finally, I used a fillet to round the top parts and gave it the right colour.

Waist #7

Nearly there!


Lego Man Torso Modelling

So for the next part I decided to get the torso done so that when I model the parts that connect to it I will know what dimensions to use.

As usual, I started by drawing a simple profile.

Body #1

I then extruded it, added the part that the head connects onto, cut and shelled the inside and finally added the arm holes into the sides.

Body #2 Body #3

After that I started on the internal structure. I did this in a set of developments. Firstly I drew a quarter of it and then added some centre lines to mirror it. Secondly I Extruded it down and filled in the middle bit. Lastly I rounded off the parts in the centre. It was quite a hassle to measure as my vernier calipers didn’t fit in some of the places and I had to do a bit of guesswork.

Body Details Body #4

The last thing I had to do was fillet some of the edges, put in a slight recess around the arm slots and add the decal/change the colour.

Body #5

Can you guess what it’s meant to be?

Lego Man Leg Modelling

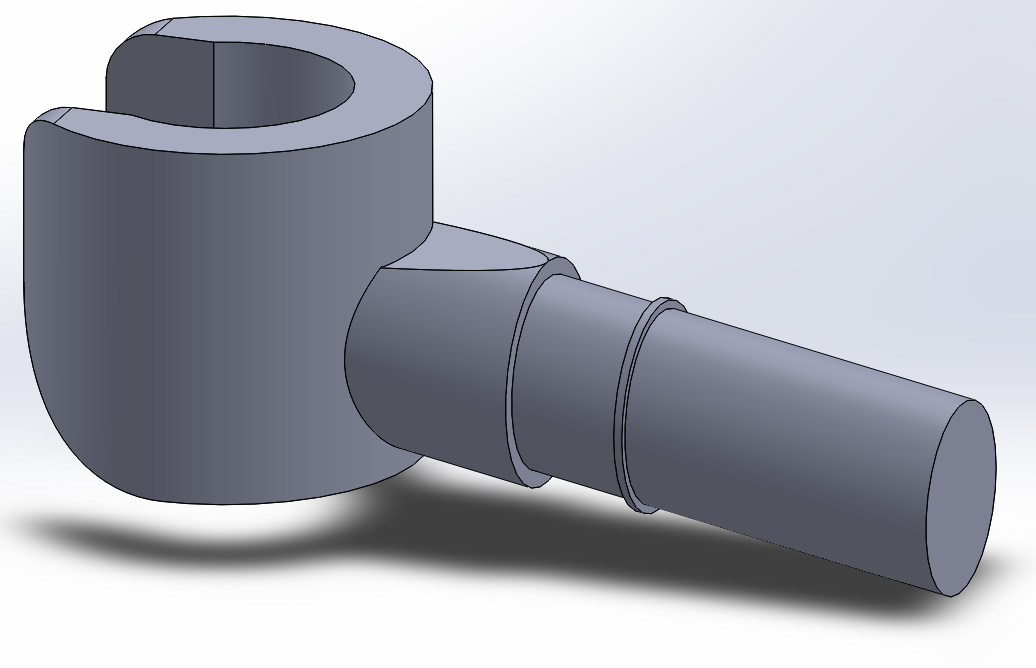
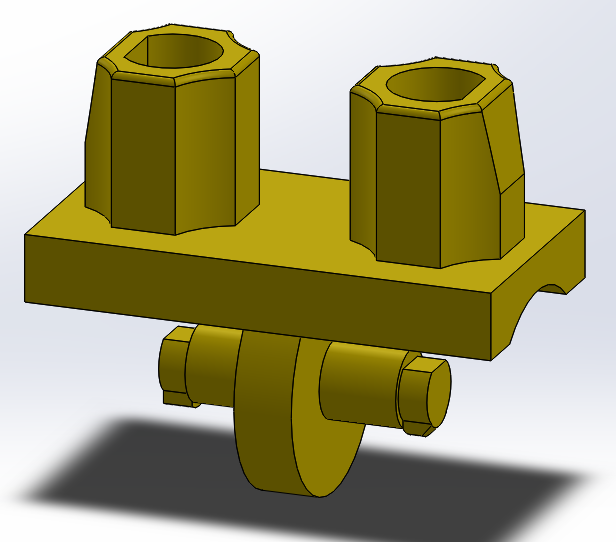
So I decided to model the leg next and I grabbed the left leg first so that’s the one I decided to work with 😛

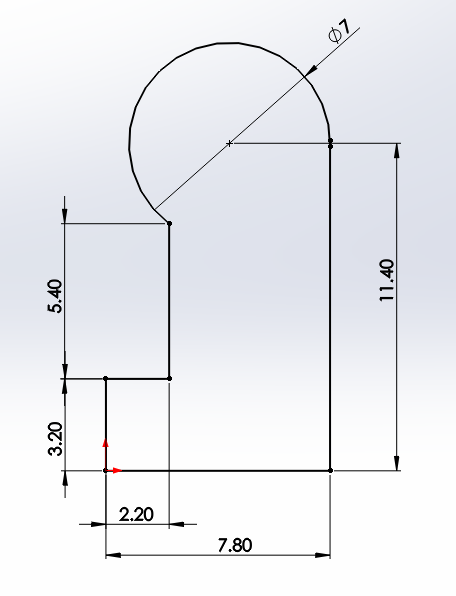
To start with I drew the side profile.

Leg #1

Then I extruded it the correct distance, put the first cut in where the hinge/movement area is and put a cut through on the other side to get the angled side. This caused me so much grief trying to find the angle and when I worked out how to do that, I couldn’t get any of the cut tools to do it for me – that is until I discovered that I hadn’t put all of the lines necessary in to create a sketch profile that would be sufficient.

Leg #2

After that I did a few cuts from the sole of the foot and did the first circular cut at the back which was all pretty simple.

Leg #3

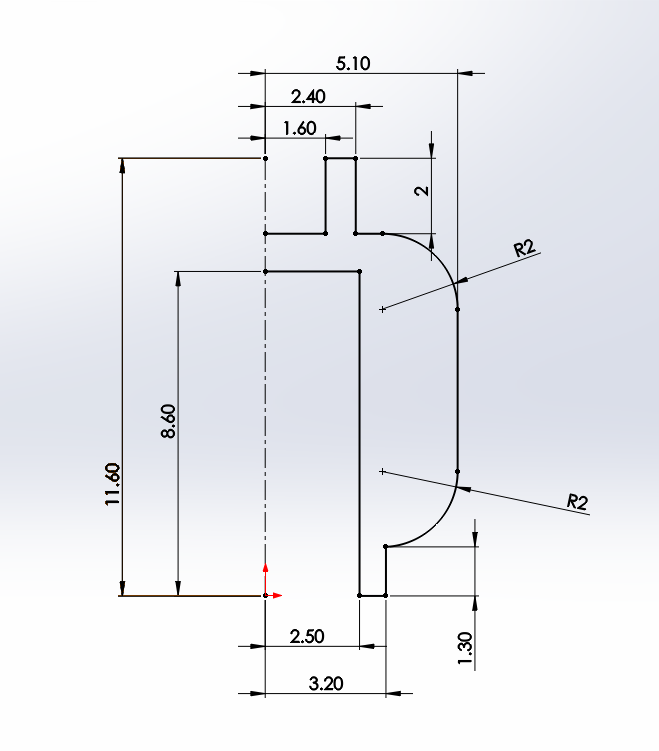
Next I put the top circular cut in and then did the more square shaped one inside that, as well as the small one on the side. The rounded back part of the hole was a pain. I couldn’t think of a way to measure it properly so i guessed at it and extruded the rounded edge at a tangent to the two edges it intersects with.

Leg #4

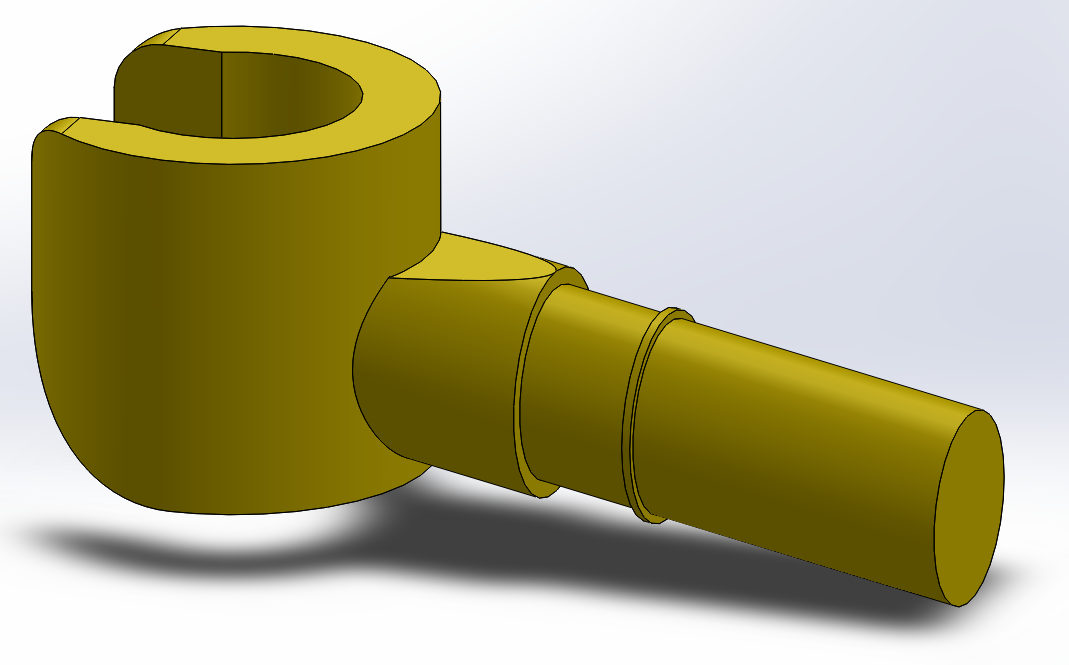
Finally I gave it some colour and a decal for fun and there you have it – the finished left leg!

Leg #5


Lego Man Head Modelling

So I shall begin my posting with how I modelled the head of the Lego man in Solidworks.

To start with I checked that I had all the dimensions I needed for it. Then I inserted a centre line and drew the lines and curves from that and dimensioned them.

Head #1


Next I revolved the sketch, added a small fillet to the top and bottom of the head (the ones at the bottom are actually smaller) and then added the decal. I had a lot of trouble with the decal disappearing as soon as i pressed the tick but then i discovered that decals in the ‘view’ tab were turned off and felt pretty silly 😛

Head #2

The Final product! It was pretty easy to do but the decal looks a little out of place.

The true meaning of this particular decal will become apparent later…